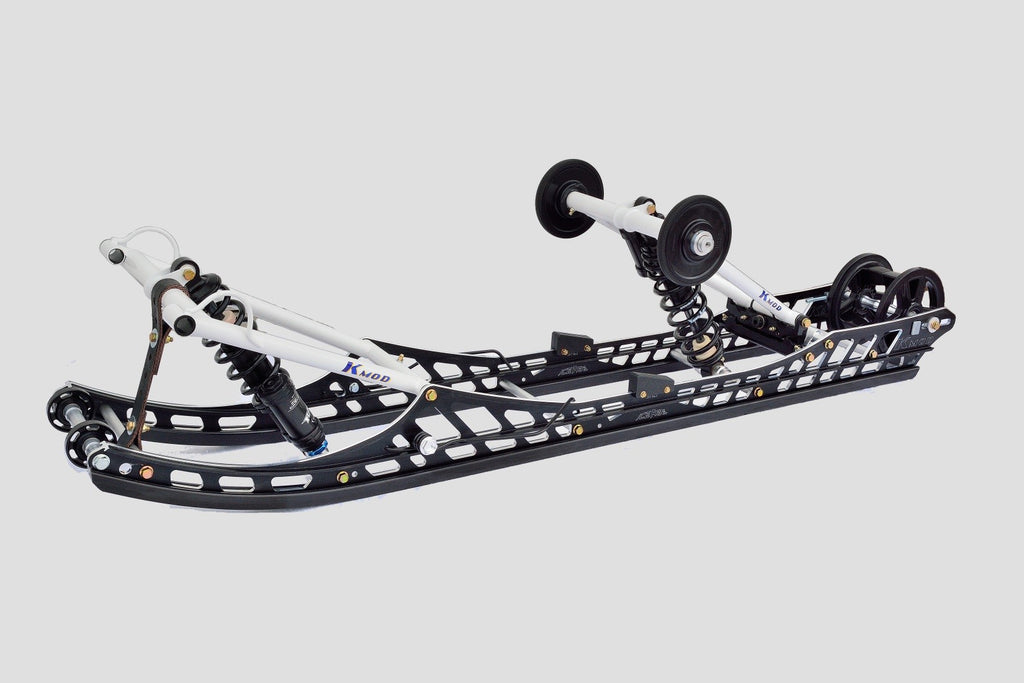

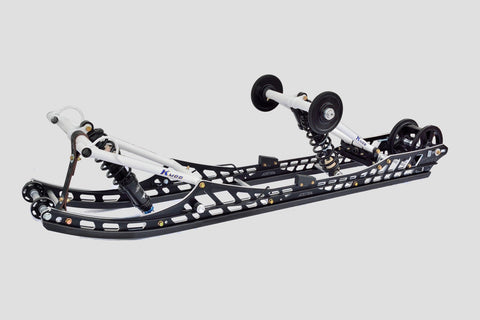


TURN KEY SUSPENSION ASSEMBLY & INSTRUCTIONS GEN 3
Unpack rails, install hifax, axle adjusters, and jounce bumpers. (Tall side forward on the jounce bumpers) .See slide rail instructions included.
Install anti-stab kit and front cross shaft, leave the bolts loose on the cross shaft so other shafts can be installed, use blue Loctite on all bolts.Install one of the shock cross shafts (7/8’’x 8-3/4’’ shaft) temporarily in rear of rails to keep rails square while assembling front of skid.
Install front arm, using ¾’’ x 8-3/4’’ shaft in lower arm (shock mount facing to the rear).
Install the shock cross shaft in front shock (Raptors, Fox, shock with shorter spring), (center shock on shaft (2-15/16’’ on each side) and Loctite set screws on lock collars) with small thin washer against shock on each side and then one lock collar on each side. In the rails there are two mounting locations for the front shock, use the rear hole to mount the front track shock (On front track shock, leave spring loose until shock is bolted in rails, bolted to the front arm and limiter straps are installed and adjusted) Tighten all front bolts on arm, anti-stab, and front cross shafts, keep rails flat while tightening bolts.
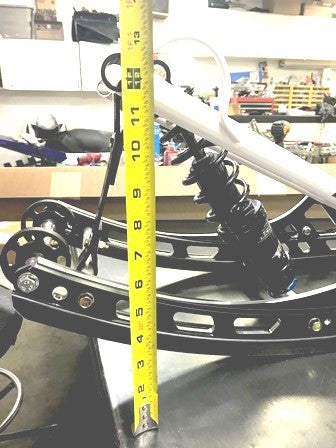
Install limiter strap and adjust so there is 12.5’’, (12’’ for7 tooth drivers) from the ground to the center of front arm upper tunnel spacers, then preload front shock spring to 7.5’’ free length
See shock adjustment page for clicker settings.
Assemble rear wheels over rear axle and secure wheels together with three ¼’’ bolts and nuts.
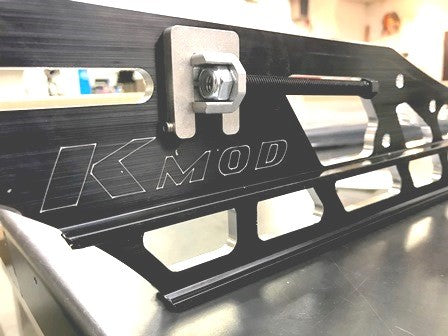
Install axle adjusting assembly in the rail, after installing the U shaped keeper (see photo) use blue Loctite on the set screw, install set screw and snug. Install axle with wheels and axle adjusters in rails, leave outside bolts finger tight.
Install rear pivot with shim on each side of the pivot, shim towards rail, the front of the pivot has a smaller flat surface. Leave bolts loose. If you have the K Motion option then it has no shims, just mount between rails.
Install rear arm on the pivot (shock mount towards rear) using ¾’’x 6-3/4’’ shaft (installed in pivot for shipping).
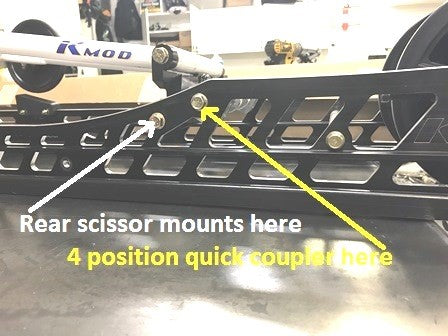
Assemble rear shock on cross shaft (center shock on shaft with washer against the shock and then lock collar on each side)(2-15/16’’ on each side). Loctite the set screws on the lock collars. Install in shock hole forward of rear scissor in rail, bolt shock to rear arm, leave all bolts on the rear arm and cross shafts finger tight till coupler block shaft is in.
With K Motion the shock will be inverted compared to the front track shock. Make sure the grease zirk on shock eyelet is facing towards the rear. With Fox shocks mount shock so clicker adjuster is facing down toward the rails
Install rear arm upper shaft. Put idler wheels on shaft, and then lock collars. Center shaft so same amount of shaft protrudes out of lock collars, then tighten set screw on lock collars (use blue Loctite on set screws).
Tighten all bolts in cross shafts, pivot arm, and coupler block shafts, working side to side keeping rails square as you go.
Install ice scratchers in holes just in front of front arm mounting holes.
Grease all zirks, roll upper Torque Arm shaft while greasing. (grease the two outside zirks only on rear arm upper shaft) Grease lower pivot every 4-5 rides.( 1 pump) On front arm tunnel spacers, apply ample low temp grease to spacer and install in upper front arm (these spacers are hard coated and ride on durable Delrin bushings they only need to be lubed once a year).
Install skid in sled and use blue Loctite on bolts, ( Ski Doo’s have specific mounting positions for front arm, and new hole in drop bracket), Cat uses the stock front arm tunnel mounting. ( Axys uses new front and rear locations for rear arm, see instructions)
Set up shocks as per instruction, see instruction page included with kit.